This is the short version. If you've done this before, it may be all you need. The detailed steps, with pictures, are further down this page. Each step's link takes you straight to it.
Open the dashboard from your computer. Download the file and double-click it, so it opens in Chrome or Edge. Don't open it straight from OneDrive, SharePoint or Teams in your browser. Those show a preview of the file, and the dashboard can't be built inside a preview: you'll see Some content didn't load. Opened properly, there's no OneDrive or Teams bar across the top, and the address bar starts with file:///.
The steps
- Log into RAP via Schools Online and open the Principal's Results List. Step 1
- Choose the year and gender. Leave the other two on Higher School Certificate and All students. Step 2
- At the bottom of the list, right-click save data set, choose Save link as, and name the file by year and gender, for example 2025 Male. Save it in your RAP files folder. Don't open it in Excel. Step 3
- Repeat for every year: Male, Female, and Non-binary if anyone is listed. A single-sex school saves All students as 2025 Male or 2025 Female. Step 4
- Open your dashboard from your computer and drop in all the files at once. Step 5
- Check the year and gender for each file and click Continue. Read anything under Worth checking, tick the box and click Build the dashboard. Step 6
- Keep the copy saved to your Downloads folder. That file is your dashboard from now on. After Step 6
Next year
Save only the new year's files from RAP. Open the new dashboard from me and drop in last year's saved dashboard together with the new files. Next year
If something goes wrong
The dashboard tells you what it found. The most common messages, and what to do, are at the end of this page. If something goes wrong
Still stuck? Email me at gwright@educonsulting.com.au or call 0437 263 762, and say which message you see.
The detailed steps
You save one file from RAP for each year and gender, give each a simple name, then drop them all into your dashboard. Your results never leave your school.
Before you start
- Log into RAP via Schools Online.
- Have your school's dashboard file from me ready, downloaded to your computer. Open it from there, not from OneDrive, SharePoint or Teams in your browser.
- Make a folder for your RAP files, somewhere your school keeps student data. Keep it after you finish.
- Decide which HSC years you want in your dashboard. You save two or three files for each year.
Step 1: Open the Principal's Results List
On the RAP home page, leave the dropdown on School HSC Data and click Principal's Results List.
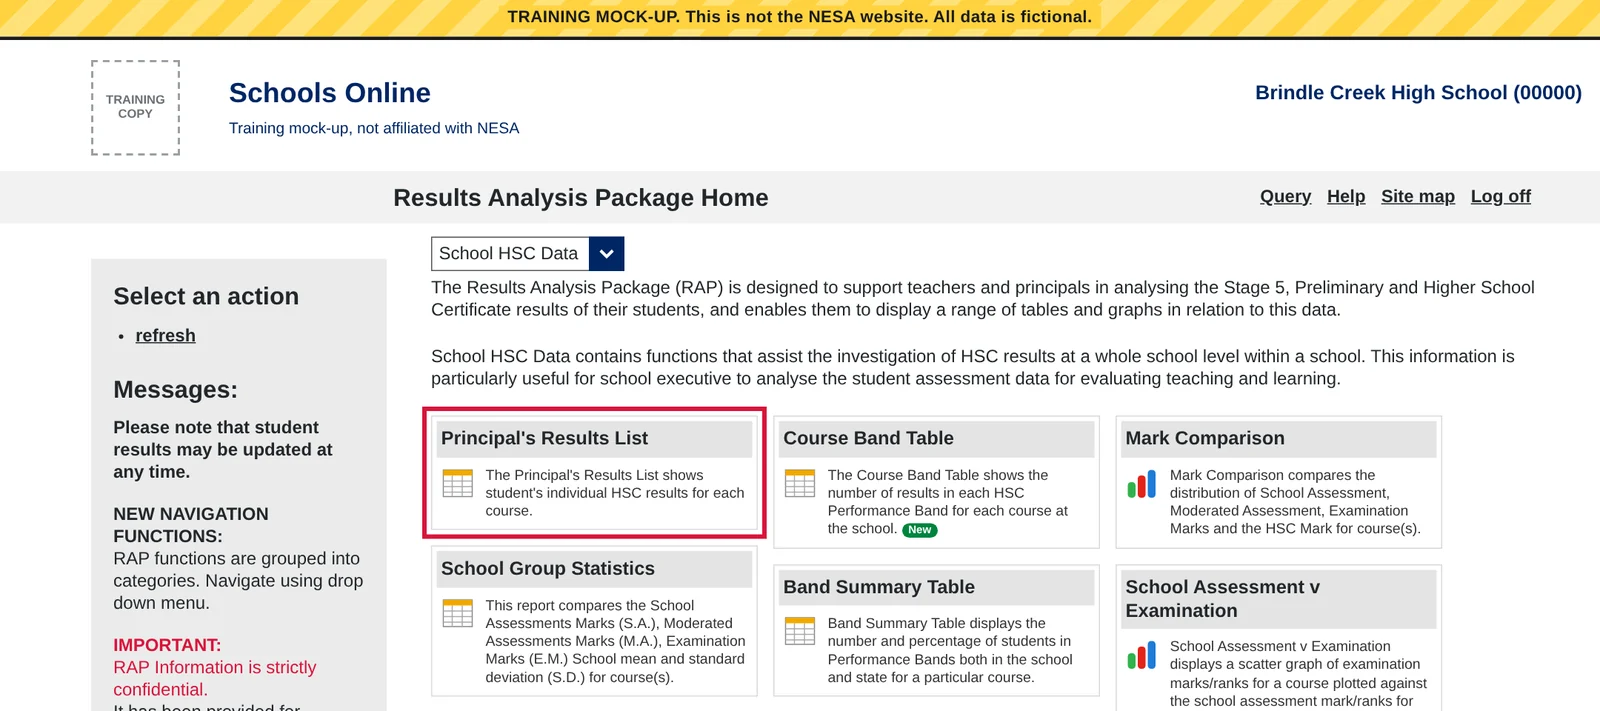
These screenshots come from a training copy of RAP with a made-up school. Your RAP looks the same, with your school's name and results.
Step 2: Choose the year and gender
Use the first dropdown for the year and the third for the gender. Leave the other two as they are: Higher School Certificate and All students.
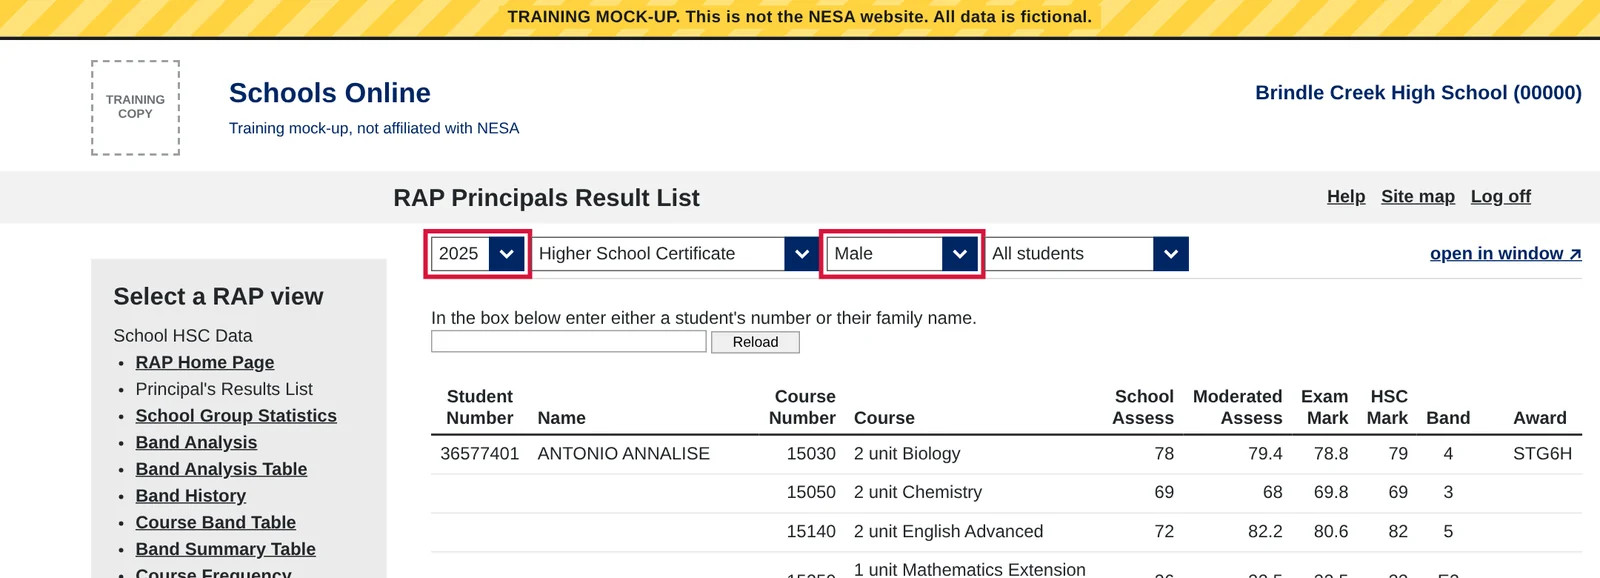
A single-sex school leaves gender on All students.
Step 3: Save the data set and rename it
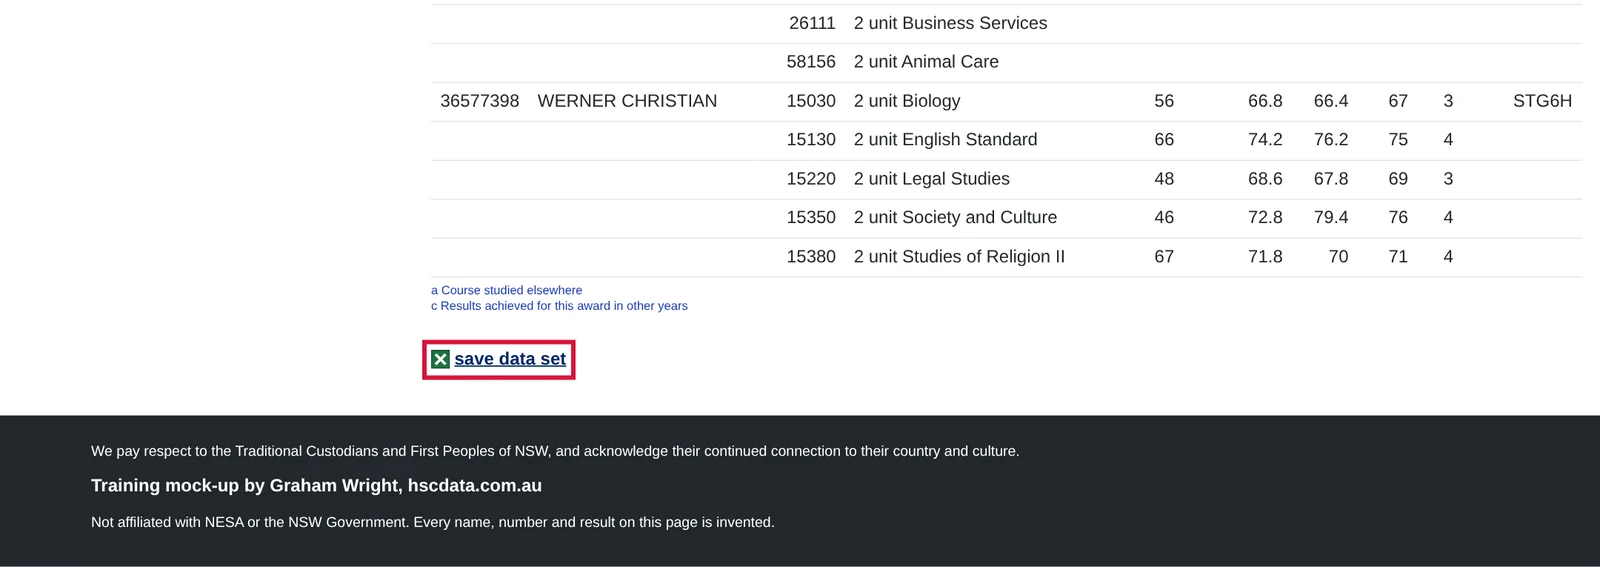
Scroll to the bottom of the list. Right-click the small save data set link and choose Save link as.
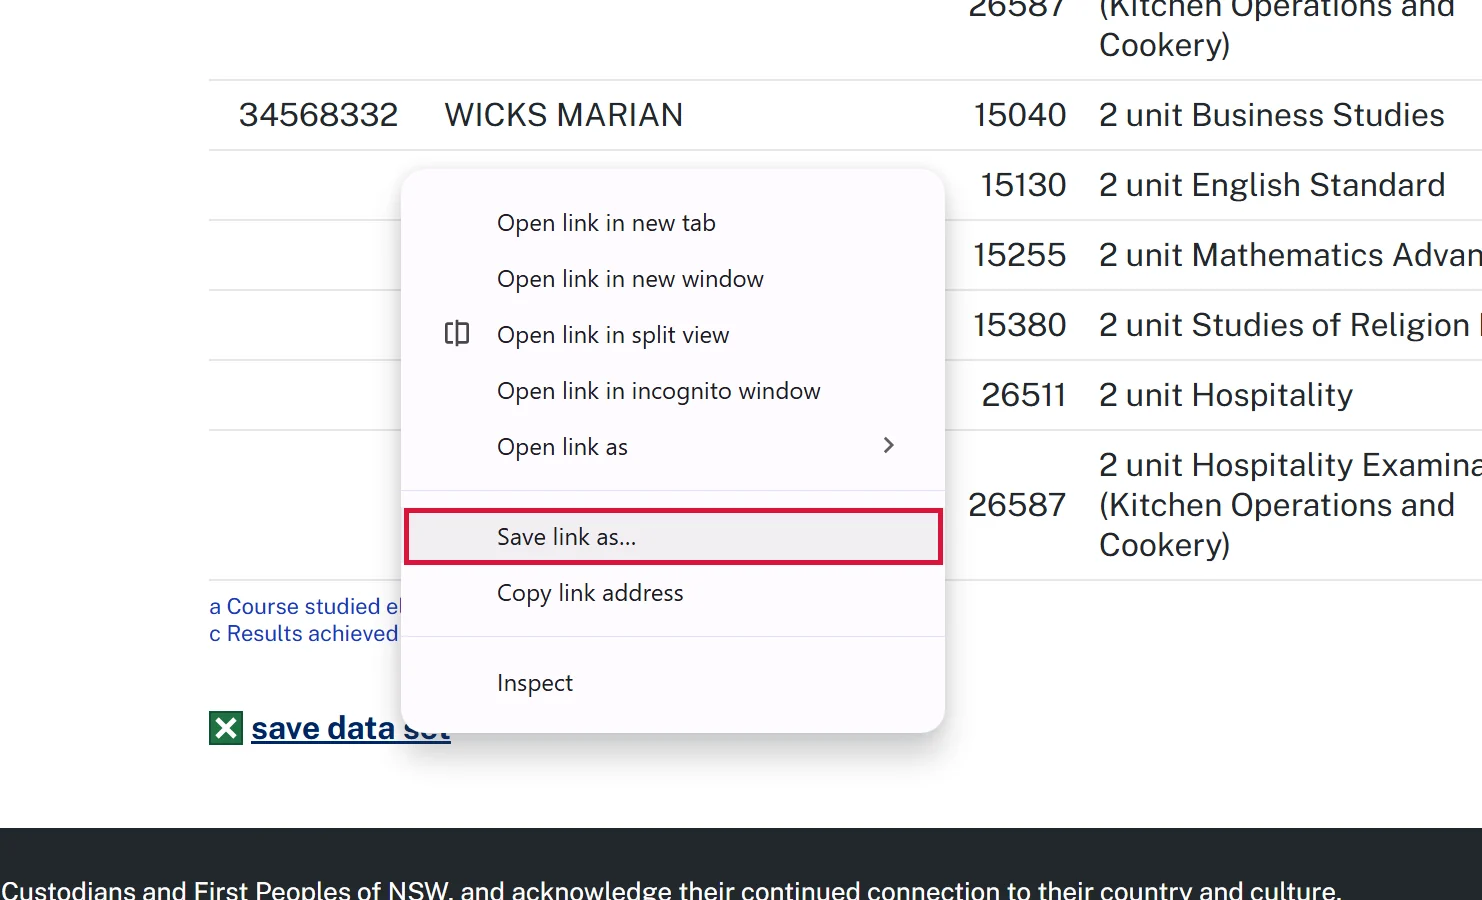
The Save As box suggests a name like this, which means nothing to anyone:
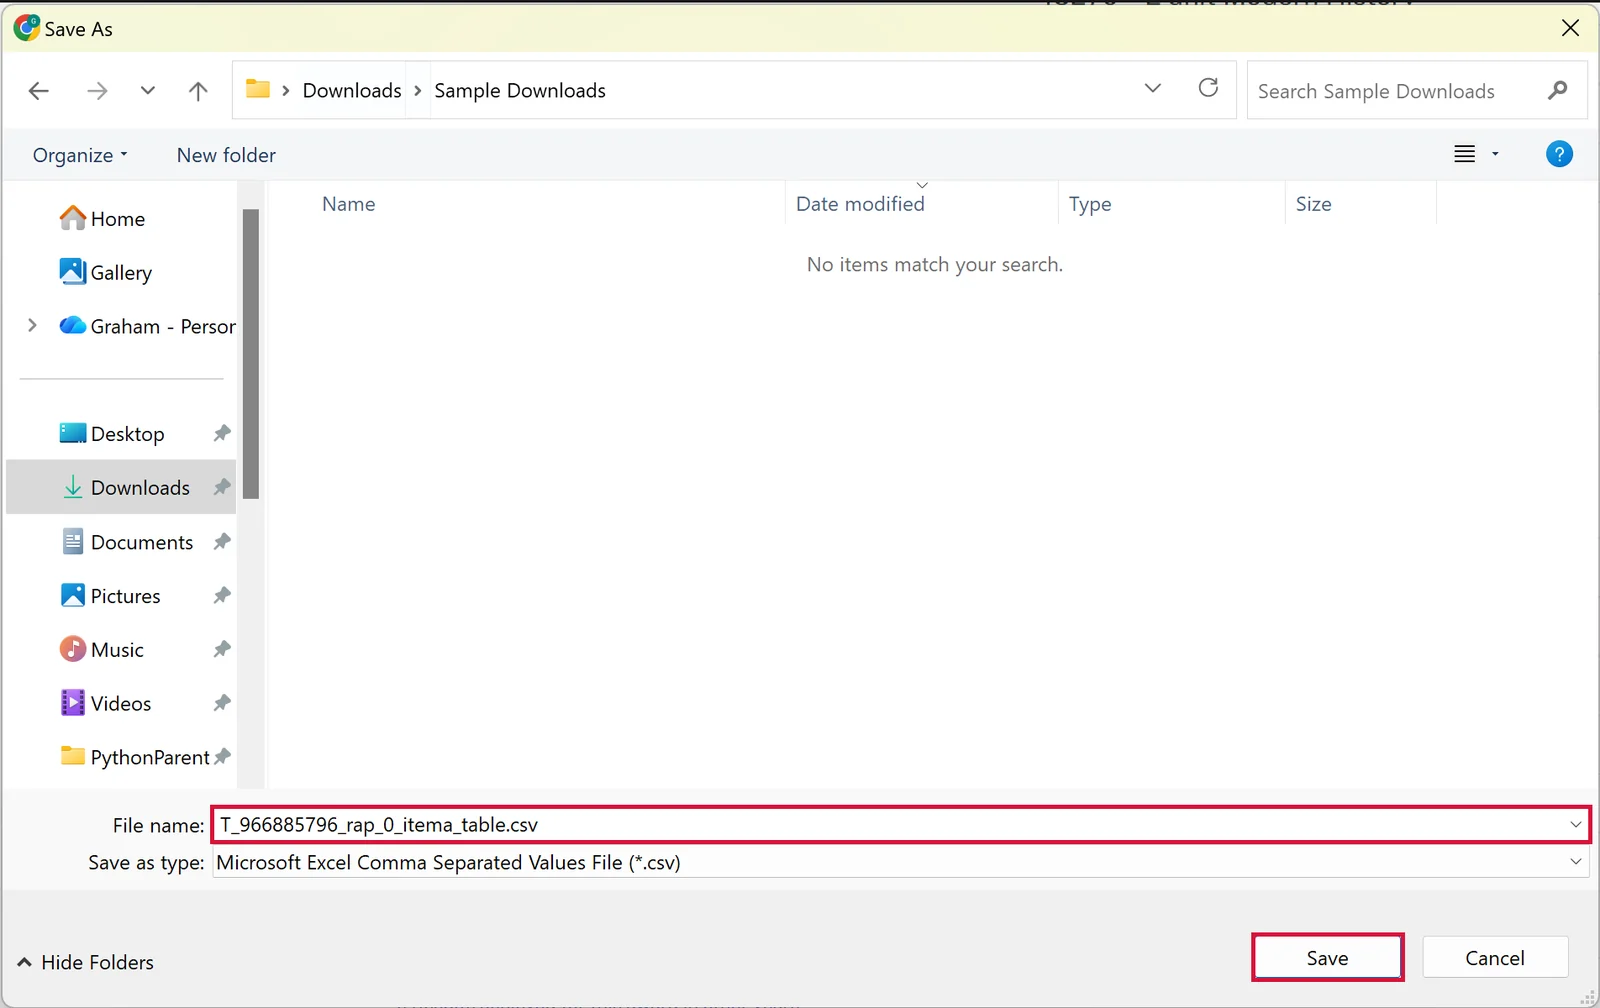
Replace it with the year and gender, then choose your RAP files folder and click Save.
| You chose | Name the file |
|---|---|
| 2025, Male | 2025 Male |
| 2025, Female | 2025 Female |
| 2025, Non-binary | 2025 Non |
| 2025, All students (single-sex school) | 2025 Male or 2025 Female |
Don't open the file in Excel first. Your dashboard needs it exactly as RAP gives it.
Step 4: Repeat for every year, including Non-binary
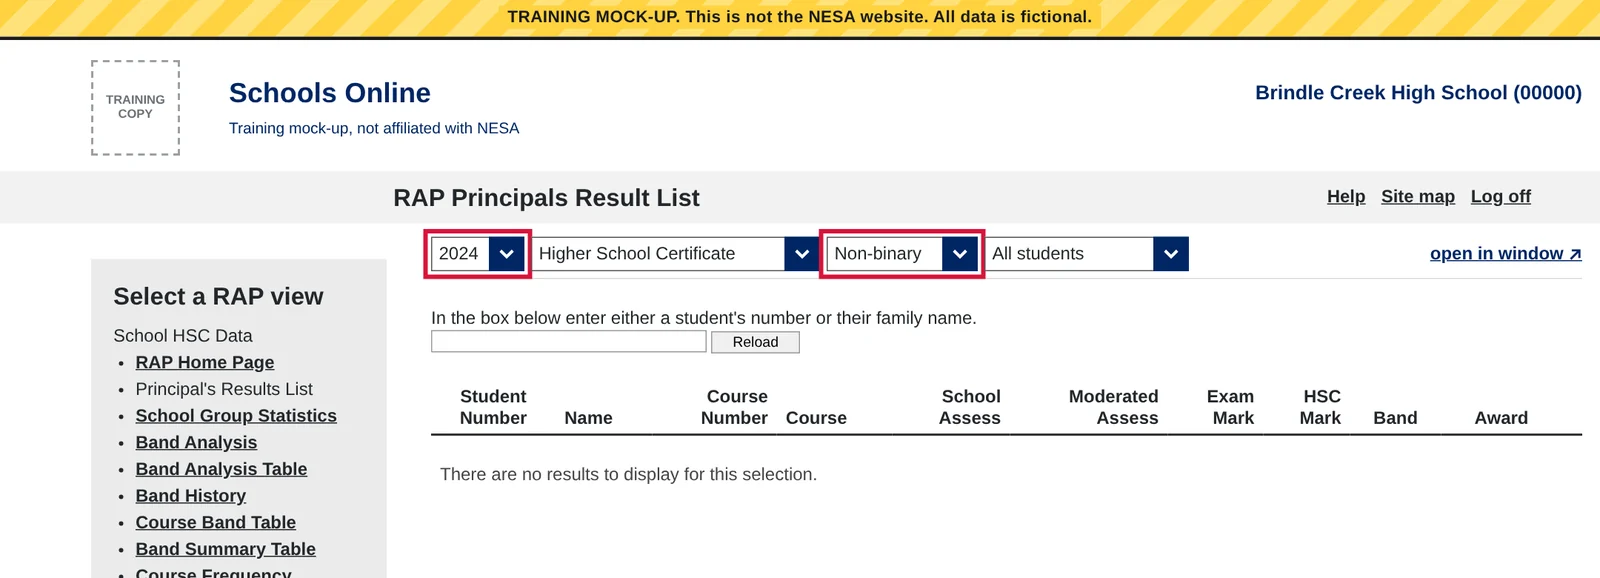
For each year, save Male, then Female, then check Non-binary. If any students are listed under Non-binary, save that file too, or their results will be missing from your whole-school figures.
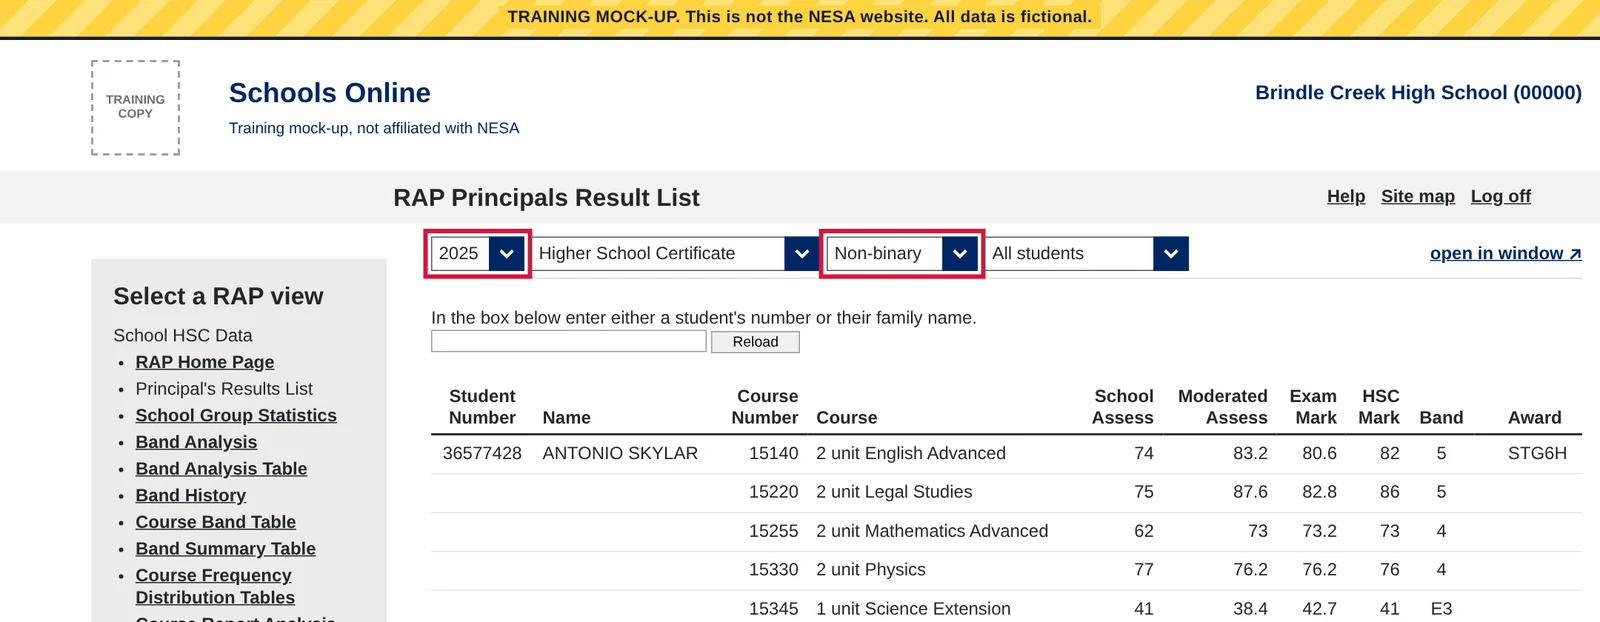
If the Non-binary list is empty, there's nothing to save for that year. Move on.
When you're done, your folder has one file for each year and gender, for example:
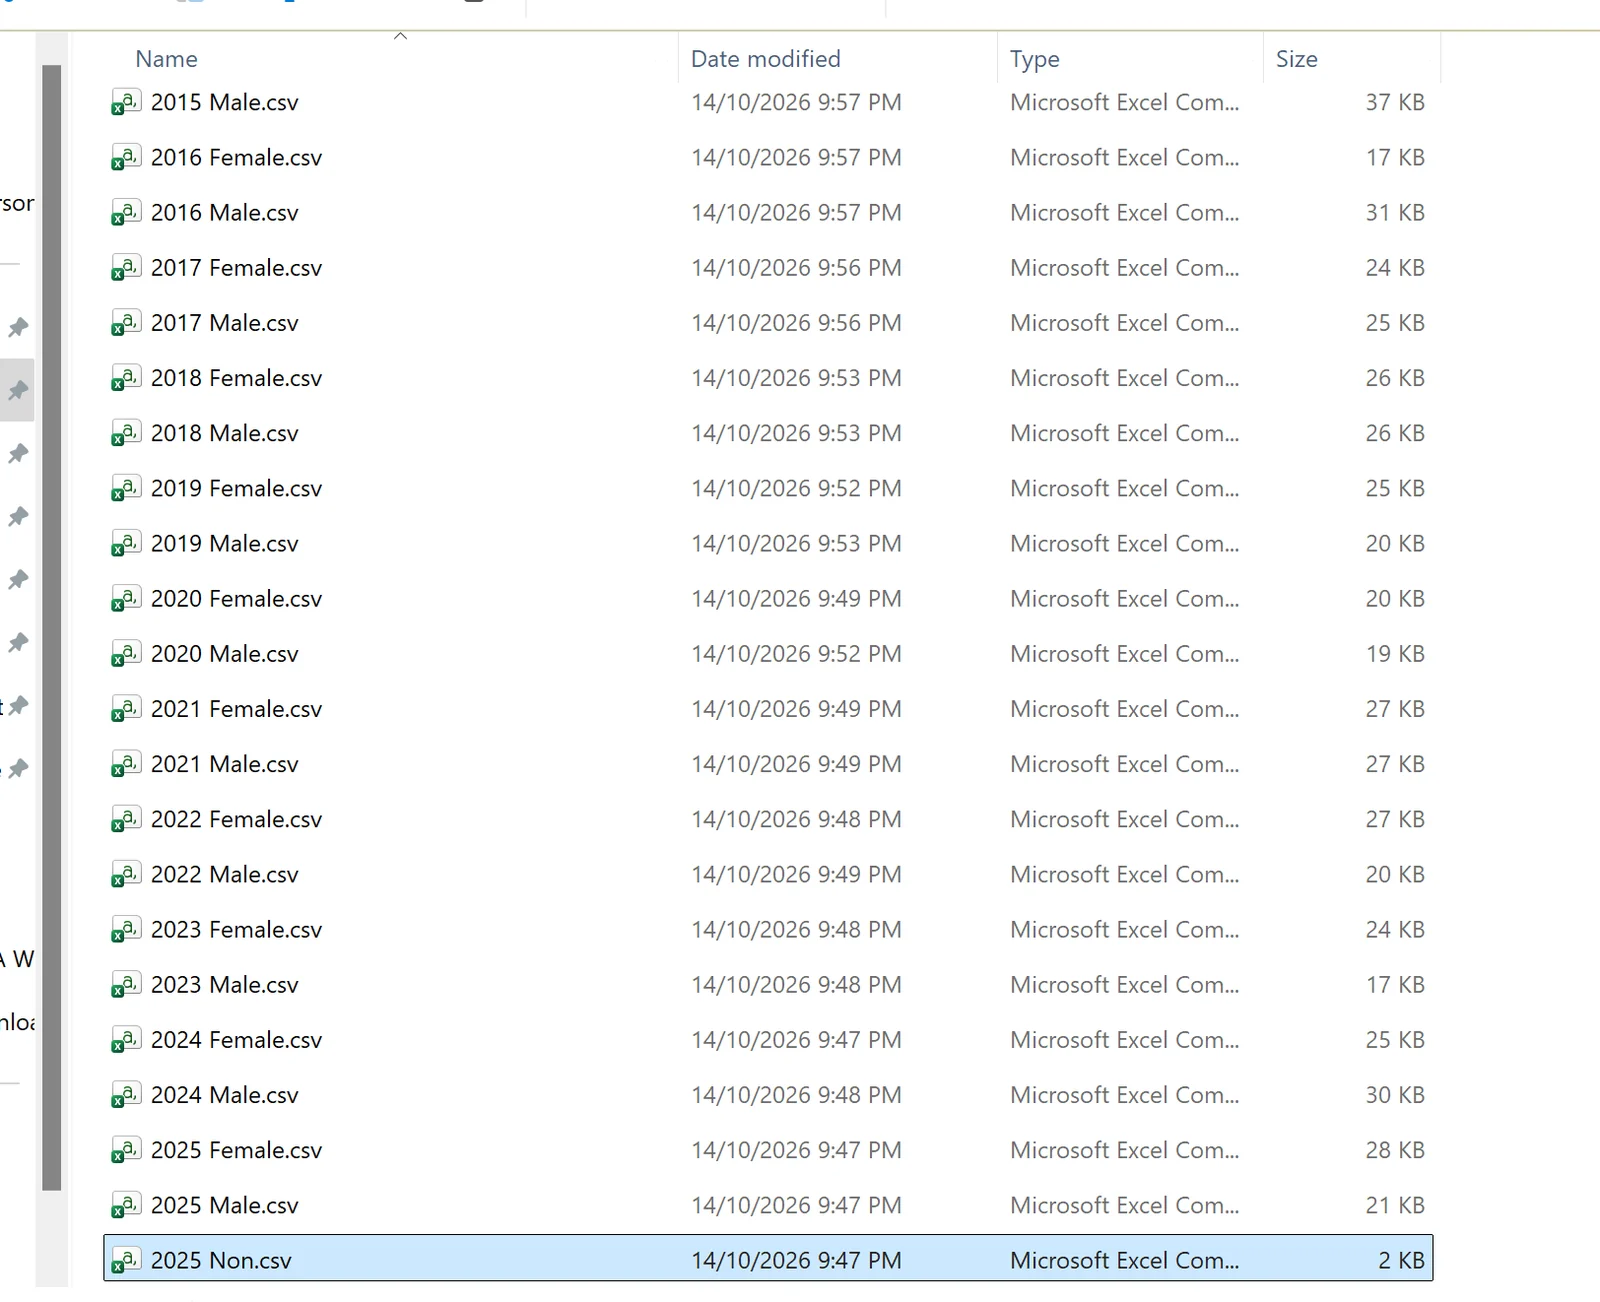
Step 5: Add all your files to the dashboard
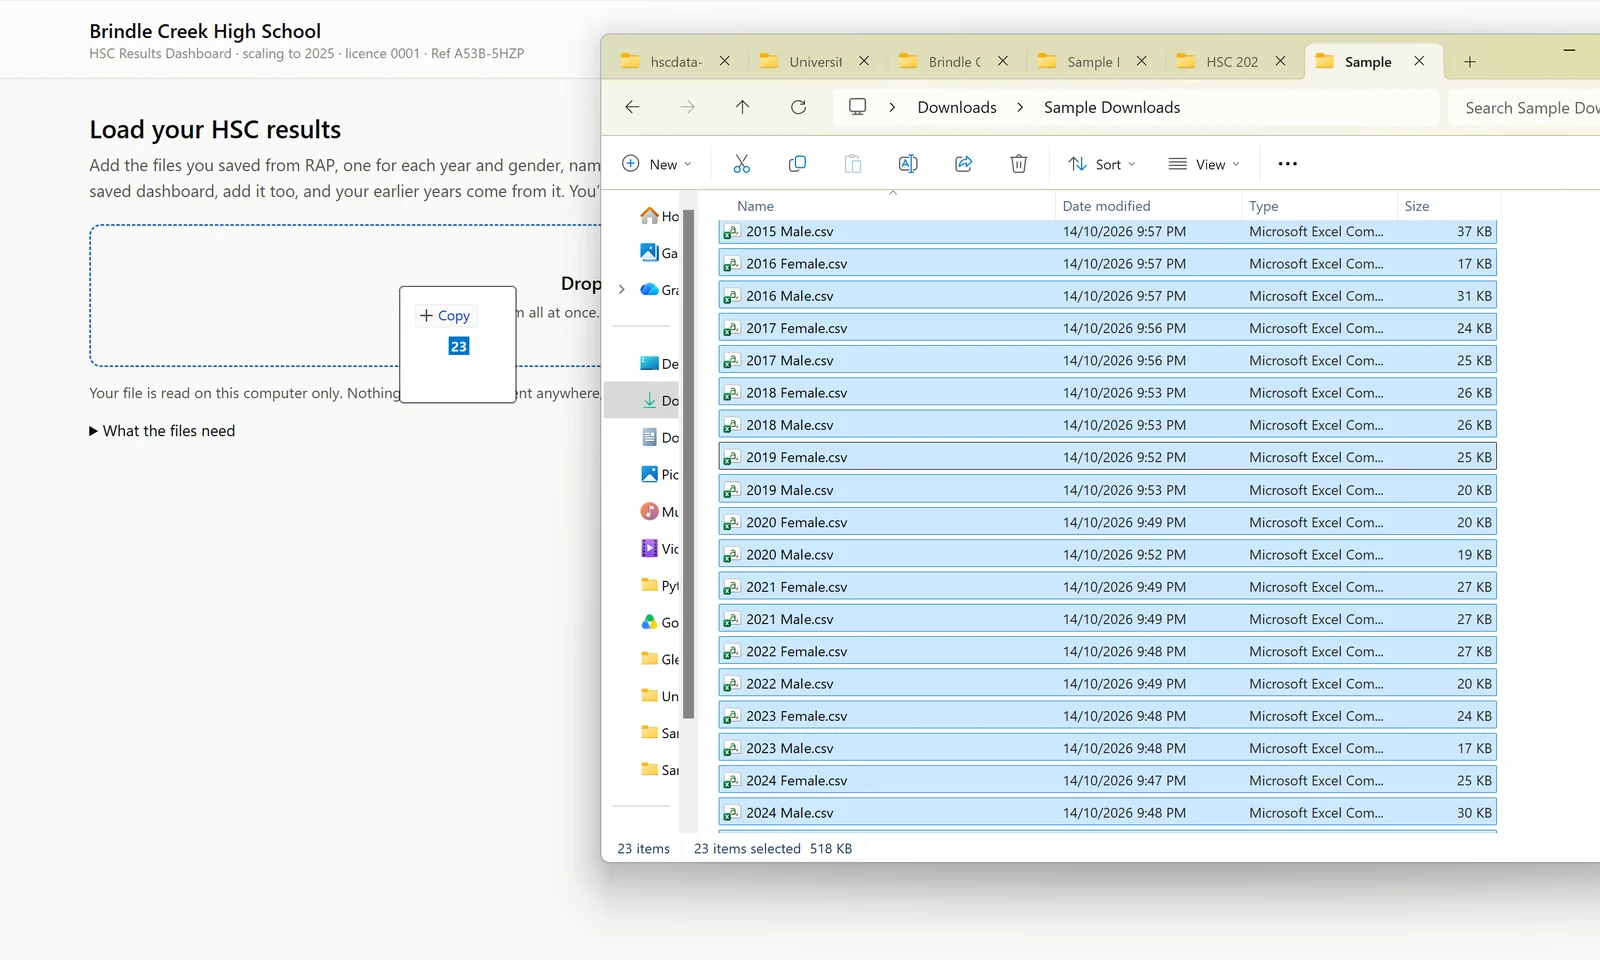
Open your dashboard file from your computer, by double-clicking it, so it opens in Chrome or Edge. Select all the files in your RAP folder and drop them onto the box, or click the box and choose them all at once.
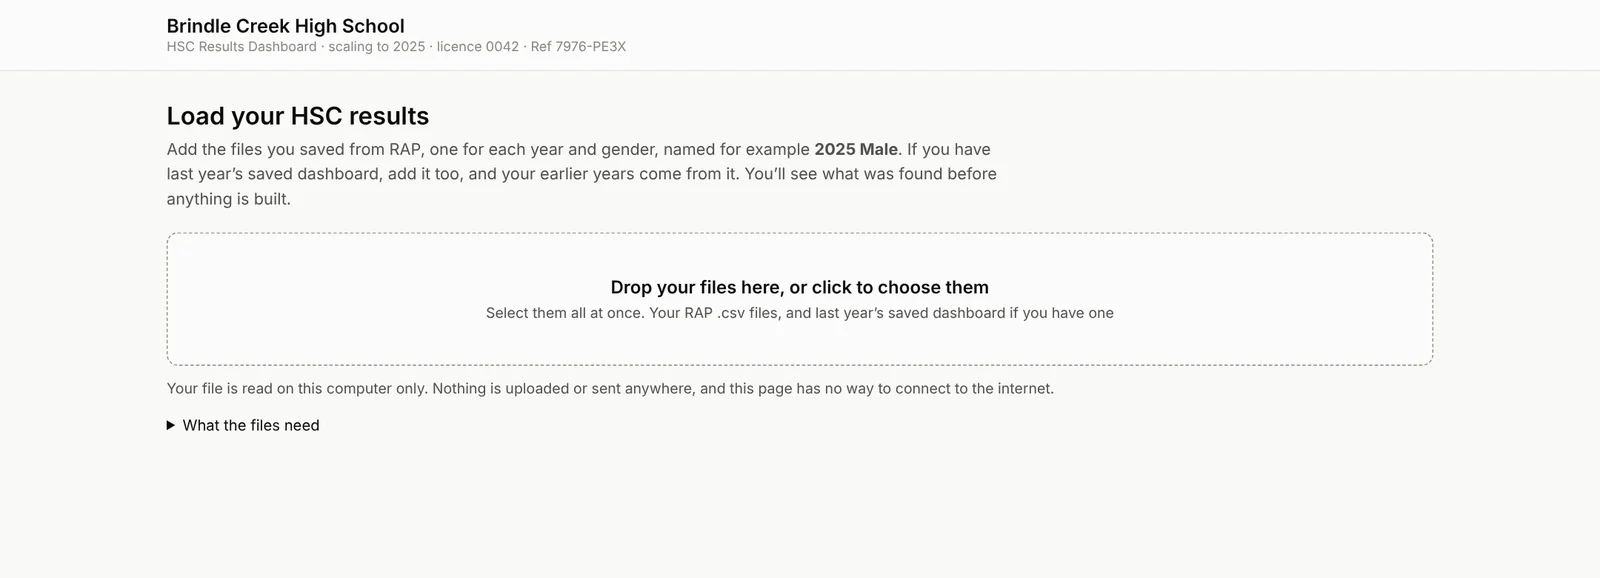
In File Explorer, click one file, press Ctrl+A to select them all, and drag them onto the box.
Nothing is uploaded. The dashboard reads the files on your computer only.
Step 6: Check your files and build
The dashboard lists every file with the year and gender it read from the name. Check each row. If one is wrong, change it in its dropdown. Then click Continue.
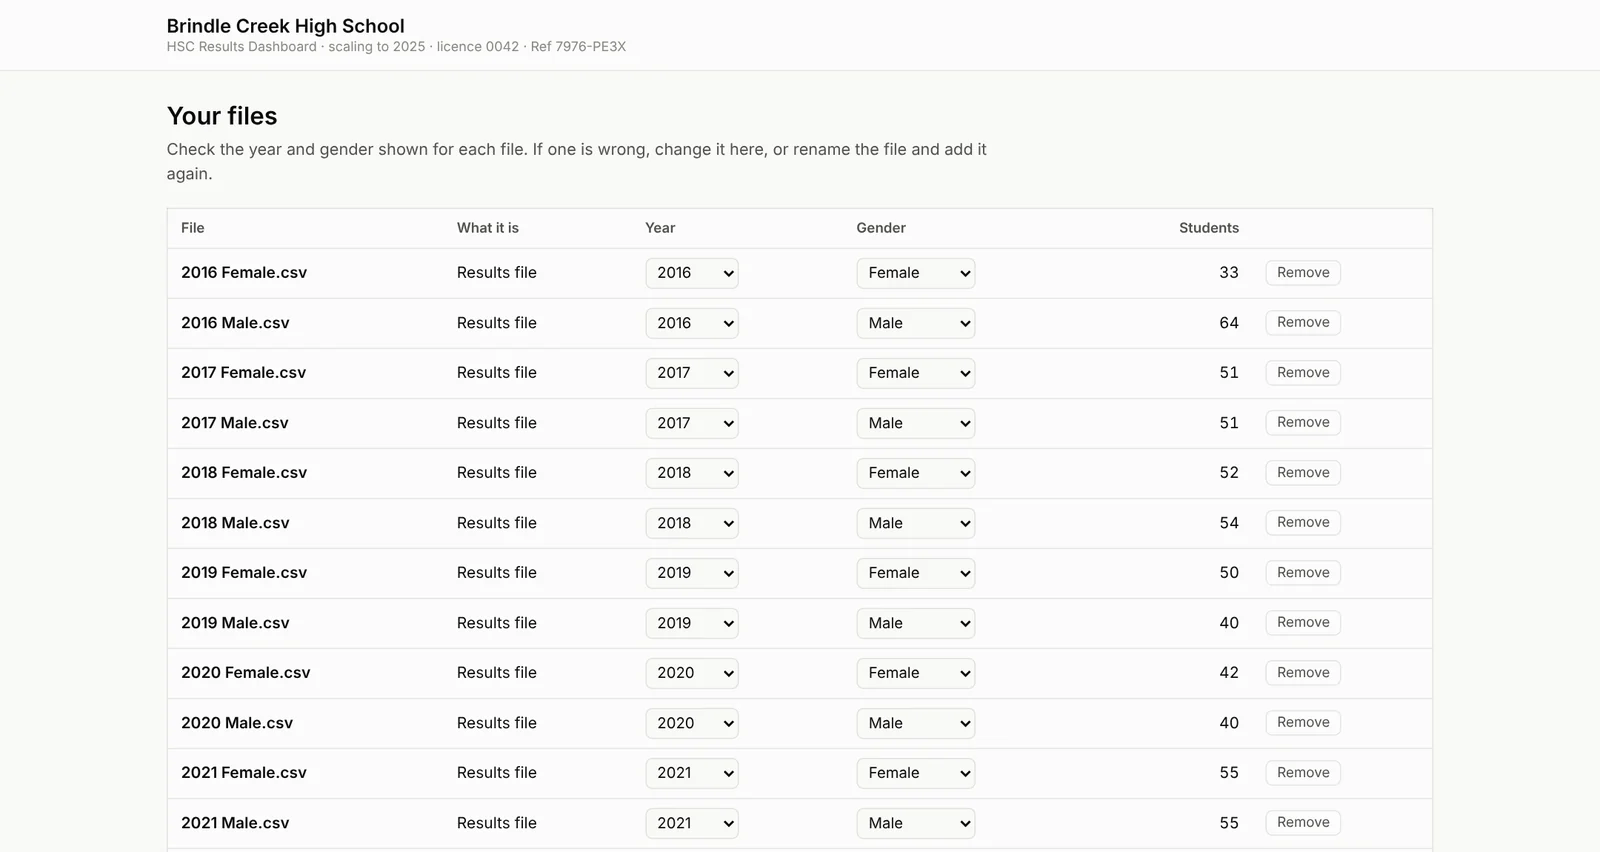
The next screen shows what was found. Read anything under Worth checking, tick the box to confirm these are your school's results, and click Build the dashboard.
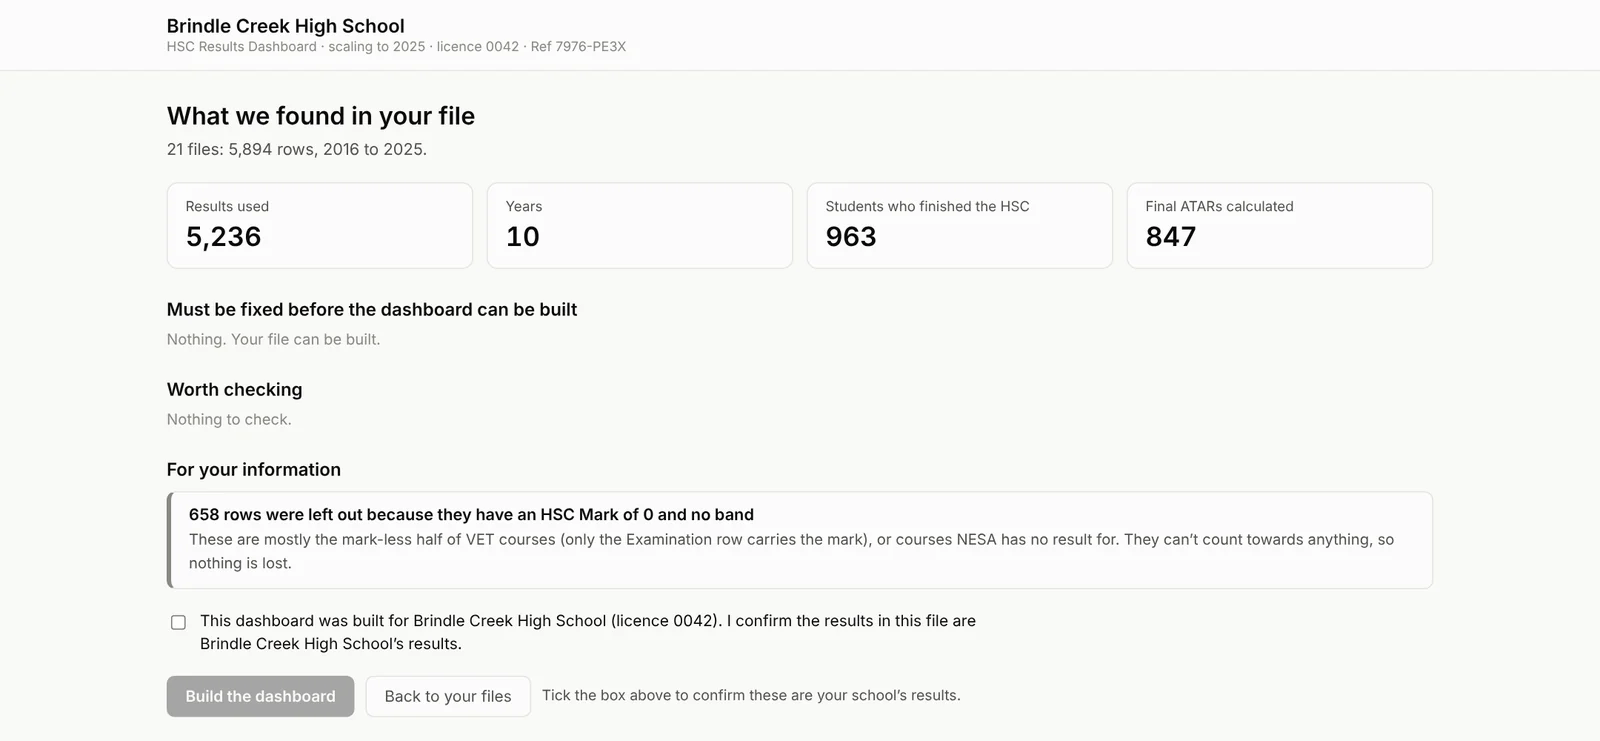
Your dashboard opens a few seconds later.
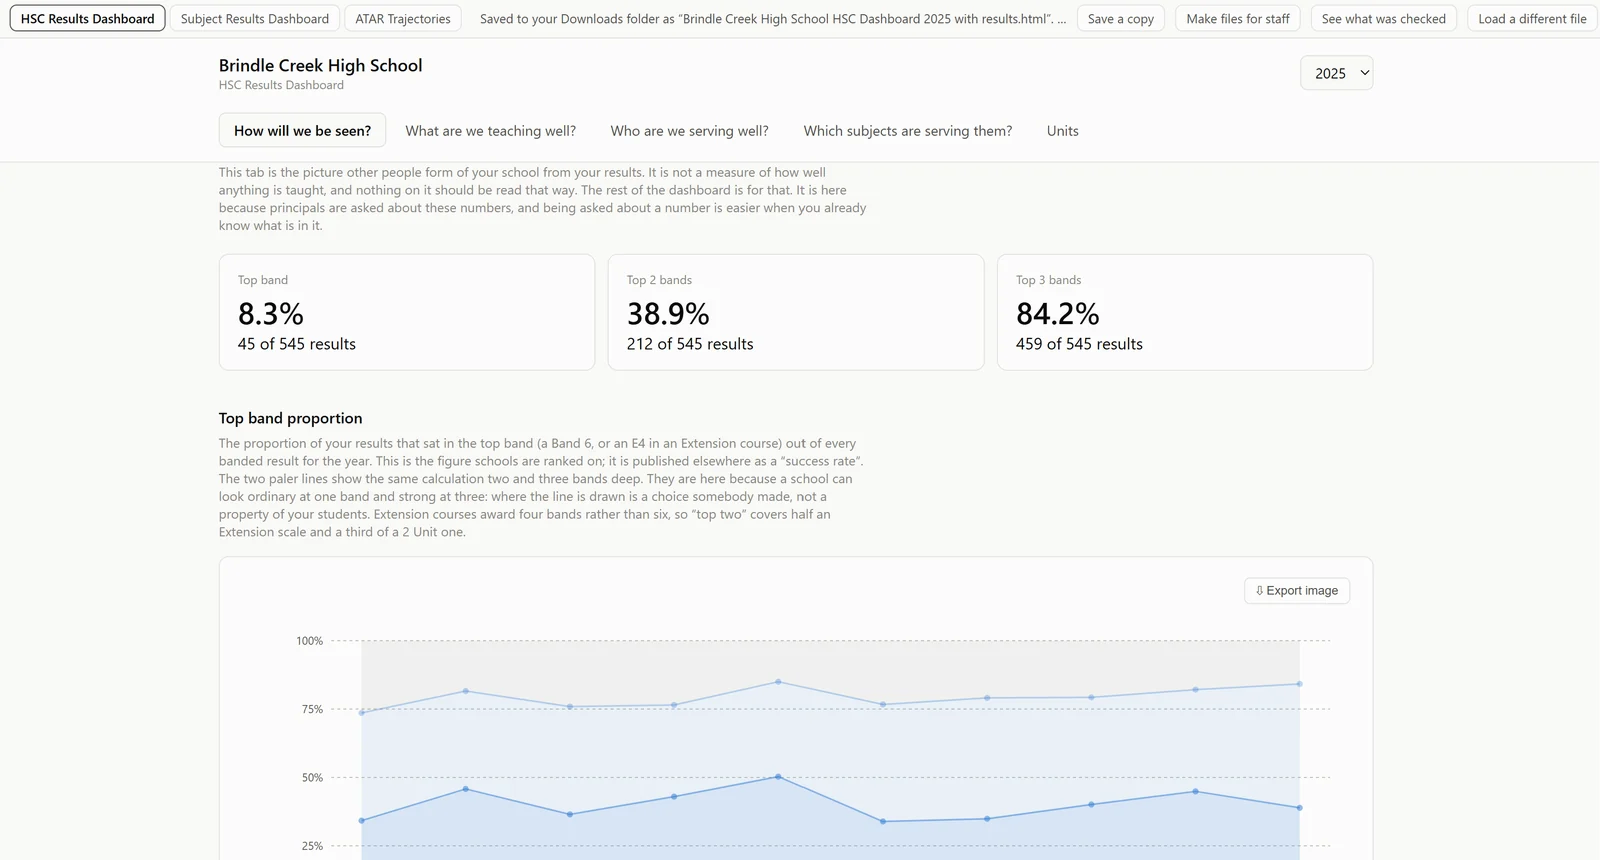
Your dashboard saves a copy to your Downloads folder, named for example Brindle Creek High School HSC Dashboard 2025 with results. Keep this file. It opens straight to your dashboard, and next year it brings all your earlier results with it. Store it wherever your school keeps student data, and open it from your computer each time.
Next year
You only add the new year. When your new dashboard arrives from me:
- Save the new year's files from RAP, as in Steps 1 to 4.
- Open the new dashboard from your computer.
- Drop in last year's saved dashboard together with the new files.
Your earlier years come from last year's dashboard, so you don't need to save them again.
If something goes wrong
The dashboard tells you what it found. Anything marked in red must be fixed before it builds. The most common messages:
| You see | What to do |
|---|---|
| Some content didn’t load, or A script didn’t run correctly | The file was opened in a OneDrive, SharePoint or Teams preview. Download it and open it from your computer. |
| Choose the year and gender | The name couldn’t be read. Choose them in the dropdowns, or rename the file. |
| The same file has been added twice | Remove one copy. |
| Two files have the same year and gender | One is misnamed. Check which year and gender each really is. |
| Two files have mostly the same students | One download was saved under two names. Save the missing file again from RAP. |
| A file doesn’t match the results already in your saved dashboard | Check the year and gender in that file’s name. |
| This is an Excel file | The file was saved from Excel. Save it again from RAP. |
| A file may be missing | A year has Male but no Female, or the reverse. Add the missing file if your school had those students. |
Still stuck? Email me at gwright@educonsulting.com.au or call 0437 263 762, and say which message you see.